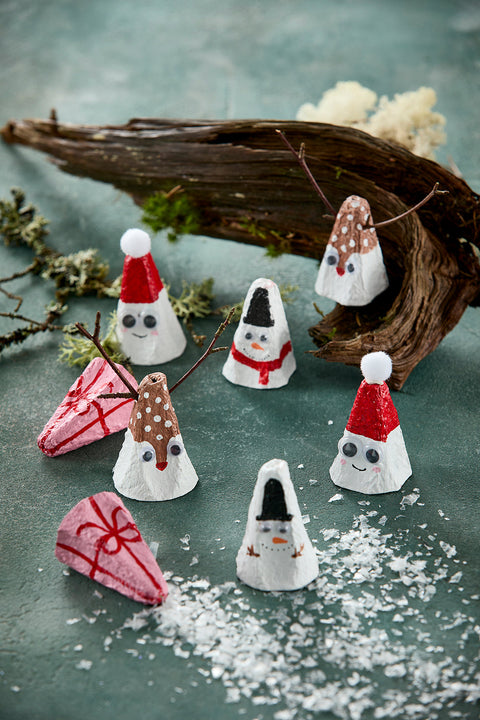
Why choose to make DIY Christmas figures?
Because it's fun, cozy, and a creative activity the whole family can join in on! It's a creative way to create a Christmas atmosphere – and you end up with decorations that no one else has. Personal, unique, and full of great memories.
Materials you will need
- Egg carton
- Paint (light blue, light pink, red, brown, black, optional skin tone)
- Blue glitter
- Googly eyes
- Yarn
- Small twigs
- White pom-pom
- Glitter pipe cleaner
- Glue gun
- Scissors
Step-by-step guide for the angel
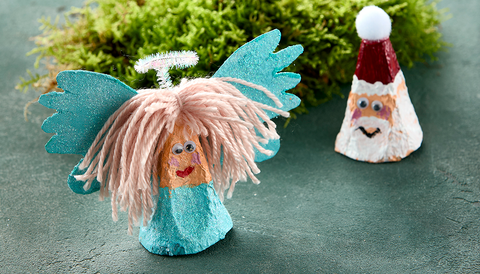
- Cut the egg carton: Start by cutting the egg carton in half, so you have the lid in one piece and the bottom in another. Then cut the cones out of the bottom; these will become the angel's body.
- Wings: On the lid of the egg carton, sketch out the wings and cut them. It is easiest to make the wings in two parts.
- Paint: Paint the wings and half of the cone light blue and sprinkle with glitter - remember both sides of the wings. Let it dry. Then paint the head with an optional skin tone.
- The head: Glue on the eyes and paint two dots with light pink for the angel's cheeks and use red paint for the mouth.
- Hair: Wrap the yarn around your hand. Cut an opening at the top of your hand - without cutting yourself, of course. Tie the yarn in the middle with a piece of yarn and glue the middle section onto the top of the cone.
- Glue the wings: Glue the wings onto the back of the angel.
-
Halo: Cut a 7-8 cm piece of a pipe cleaner. Bend a small circle at one end and twist the end tight around itself. Bend the pipe cleaner 90 degrees where you twisted it and glue the straight part onto the wings.
Step-by-step guide for Santa Claus
- Cut the egg carton: Start by cutting the egg carton in half, so you have the lid in one piece and the bottom in another. Then cut the cones out of the bottom; these will become Santa's head.
- Paint: Paint a little over half of the cone with an optional skin tone and the rest of the cone with red, which will form Santa's gnome hat. When it is dry, paint the white edge along the base of the hat and Santa's beard.
- The head: Glue on the eyes and paint two dots with light pink for Santa's cheeks and some black paint for the mouth.
-
Glue the pom-pom: Glue the pom-pom on top of the cone so the gnome hat gets its tip.
Step-by-step guide for Rudolph
- Cut the egg carton: Start by cutting the egg carton in half, so you have the lid in one piece and the bottom in another. Then cut the cones out of the bottom; these will become Rudolph's head. Cut two oval circles out of the lid from the egg carton; these will become Rudolph's ears.
- Paint: Start by painting the cone and the ears brown. When it is dry, paint Rudolph's nose with a red dab of paint and black for the mouth.
- Eyes: Glue on the eyes.
- Ears: Make a small oblong hole on each side of Rudolph's head and insert the ears.
- Antlers: Make a hole in the top of the cone and insert two small twigs as antlers.
Tips for variations
- Paint the angel white and glue lace onto it.
- Glue white pearls onto the body and wings.
- Attach a string to the angel so it can hang as a decoration.
- Turn the cone upside down and paint Rudolph's nose on one of the edges of the cone.
- Make Mrs. Santa Claus.
Frequently Asked Questions
How many figures can I make from one egg carton?
Typically 2-4 pieces, depending on the size.
Can I make other things out of my egg carton?
Yes! Try our other DIY figures, hangers, and get inspired.
How long does it take?
Approx. 20-30 minutes per figure.
Christmas coziness for the whole family
There is something quite special about gathering around the table and making your own Christmas decorations, children as well as adults. It is a chance to spend time together and unleash your creativity. So, get the materials ready and let's get started!